Officer guide — the gate
You are the officer at the gate. Your job is simple: scan each learner’s badge, confirm who is arriving or leaving, and let the system do the rest. This guide walks you through every screen on the phone, in order, plus the few things to know when the network drops.
Everything you record is immediate and permanent at the school the moment you press a button, and guardians are notified automatically on their verified contacts. You never type a learner’s name and you never have to remember whether someone is “in” or “out” — the phone works that out and asks you to confirm.
Signing in
You sign in on the phone in your hand, not a desktop.
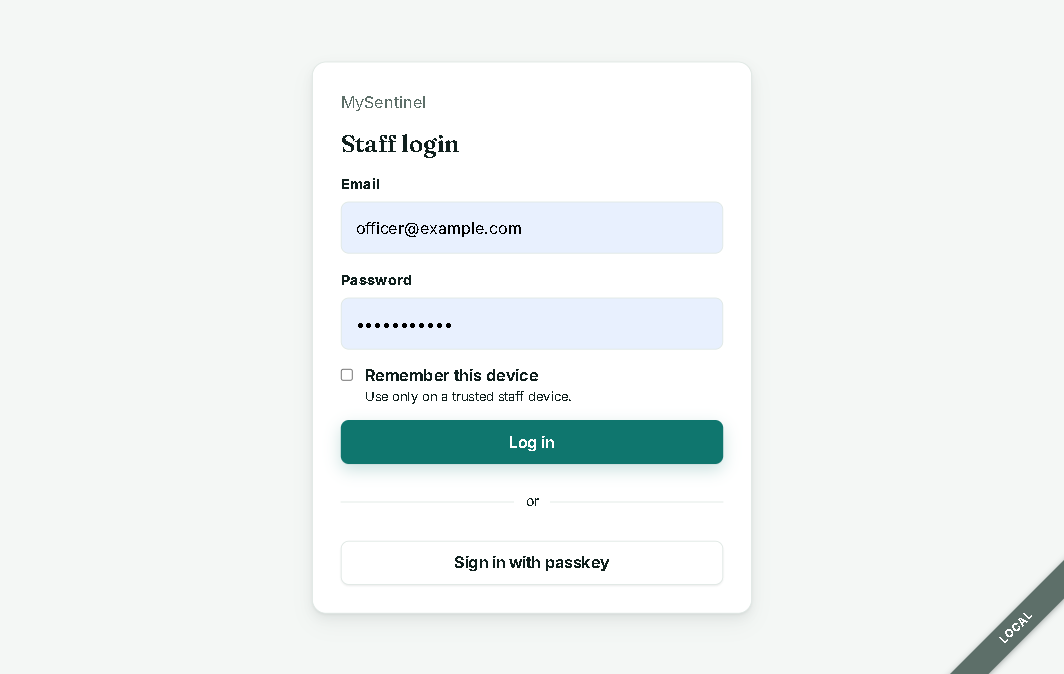
- Open the MySentinel app. On the staff login screen the demo credentials are pre-filled.
- Tap Sign in. If your school has passkeys set up, you can instead tap Sign in with passkey and use the phone’s fingerprint or face unlock.
- Check the environment banner at the top. On a test device it reads “Environment: Local. This is not production.” — that tells you nothing you do here reaches real guardians.
Once you are in, the Gate screen is your home. The bottom (Field) menu gives you: Gate, Check tag, Visitors, Waiting to send, and Offline pack. Your account menu (top right) has Profile, Passkeys, Sessions, Appearance (System / Light / Dark), Language (Use school default / English / Afrikaans / isiZulu), and Logout.
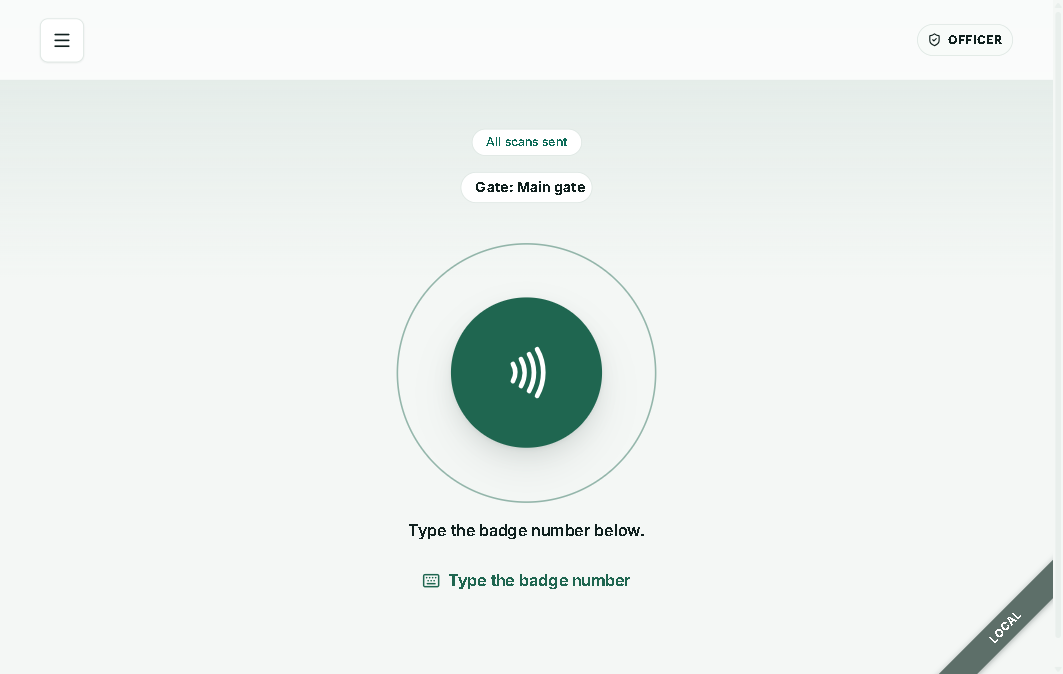
The Gate screen
The Gate is one screen with one job: scan badges. There is a large breathing NFC target in the middle, a one-line sync pill at the top, and a quiet manual-entry option at the bottom.
- The sync pill reads “All scans sent” in green when everything is recorded, or “Waiting to send (N)” in amber if something is still queued. Tap the amber pill to jump straight to the outbox.
- If your school has more than one gate, you’ll be asked to pick your Gate zone (for example, “Main gate”) before your first scan. A chip at the top shows the chosen gate with a Change gate option.
Scanning a badge (NFC tap)
On an Android phone the reader arms itself when the Gate screen opens. The status line reads “Hold a badge near the top of the phone.”
- Hold the learner’s badge to the top-back of the phone.
- The phone reads the badge and opens the decision screen automatically. No button press — every tap resolves hands-free.
If the browser asks for a tap first, the status line shows “Tap to arm” — tap the target once, then scanning is hands-free for the rest of the day.
On iPhone: the in-browser tap-to-scan isn’t available, so the Gate shows a hint to use the manual fallback below. Use Type the badge number instead.
Typing the badge number (manual fallback)
When a tap won’t read, or you’re on a device without NFC:
- Tap Type the badge number at the bottom of the Gate.
- Enter the badge number and tap Continue.
The result is identical to a tap — you land on the same decision screen. Manual entry is deliberately the quiet, secondary path; tapping is always faster.
The decision screen — who is arriving or leaving
When a badge resolves, the screen leads with the learner’s face. This is the moment you confirm identity: the photo (or their initials if there’s no photo) is the largest thing on the screen, with the learner’s grade and class beneath it.
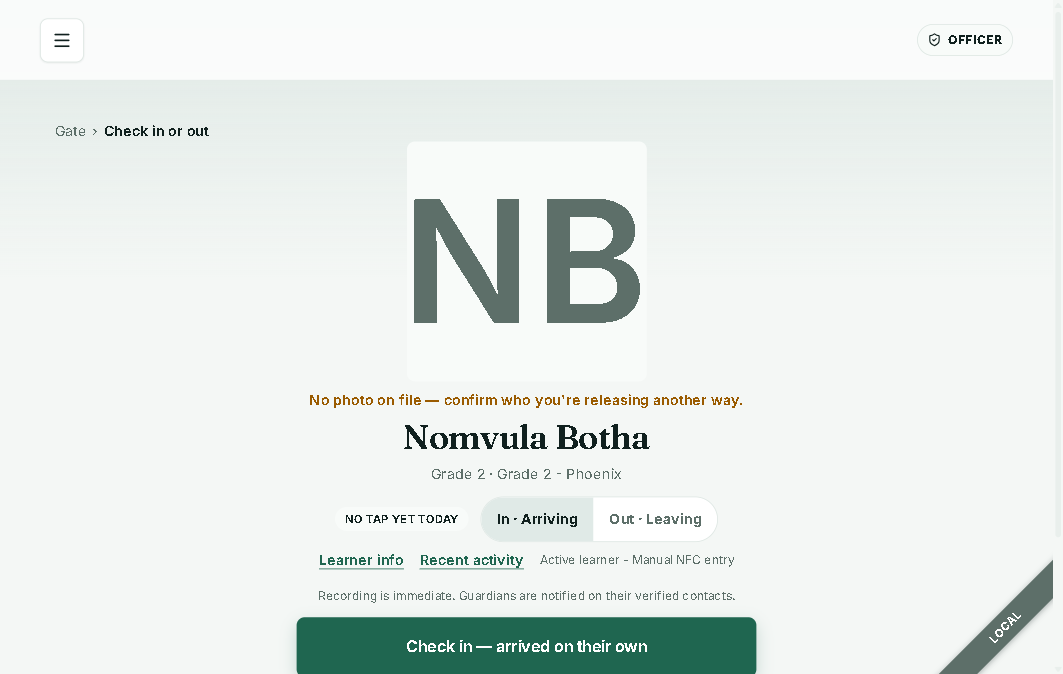
- No photo? You’ll see “No photo on file — confirm who you’re releasing another way.” Treat that as a prompt to check identity by sight or by asking, not to skip the check.
- Direction (In / Out): the phone has already guessed the direction from whether the learner is currently on-site. A toggle shows In · Arriving / Out · Leaving. If the guess is wrong, tap the other option to flip it before you record.
- Just below, a reminder reads “Recording is immediate. Guardians are notified on their verified contacts.”
Choosing how they’re released
MySentinel is guardian-optional at the gate. You have two clear choices:
- Check in — arrived on their own (or, for a checkout, the “leaving on their own” choice). Use this when the learner walks in or out themselves — no guardian is handing them over or collecting them. One tap records it.
- Dropped off by a guardian (N) / Collected by (N) — tap this to open the guardian list (the number is how many guardians are on file). Pick the guardian who is physically present, and the check-in/out is recorded against them.
If the right guardian isn’t listed, use Add guardian — the new contact is saved as pending for your admin to review, and you can still record against them.
Some learners show extra banners on this screen, all informational and none of which block you:
| Banner | Colour | Means |
|---|---|---|
| Approved pickup / drop-off | green/neutral | An admin or class teacher pre-approved this early pickup or late drop-off |
| Approved delegate | amber | A guardian delegated collection to someone else for today |
| Custody note | amber | Staff-only guidance to read before releasing this learner |
Amber here means “pay attention,” never “stop.” Red is reserved for emergencies only.
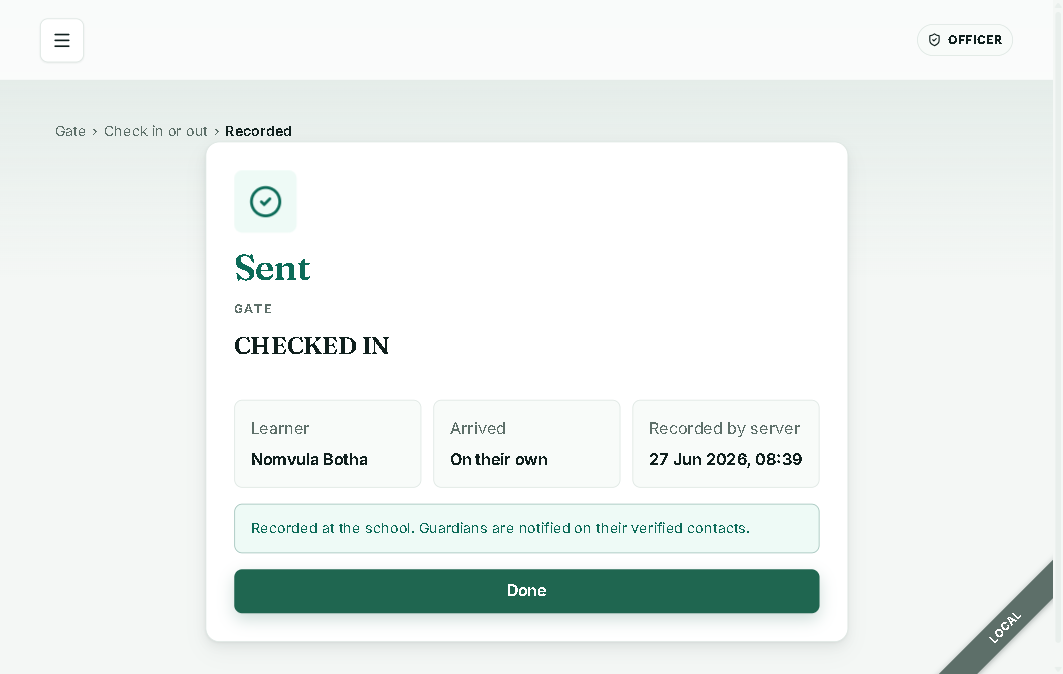
Sent vs Queued — what the confirmation means
After you record, you land on the confirmation screen. There are only two possible outcomes, and the colour tells you which.
Sent (green). A green “Sent” badge, a big CHECKED IN or CHECKED OUT heading, the learner, who released them, and “Recorded by server
Queued (amber). If the network was unreachable, you’ll see an amber “Queued” badge and “Saved on this device,” with the time it was queued. The check-in still happened from your point of view — it’s safely stored on the phone and will send itself the moment you’re back online. From here you can tap Open outbox or Done and keep scanning. The phone also gives you a different buzz for each: one firm buzz for Sent, an unsettled double-tap for Queued, so you can feel the difference without looking.
The rule of thumb: green = confirmed at the school; amber = saved here, not sent yet. Amber is never a failure — it’s a promise the phone will keep.
Waiting to send — the outbox
Open Waiting to send from the Field menu (or tap the amber Gate pill) to see everything queued on this device.
- The header chip shows “Waiting (N)” in amber or “All sent” in green.
- Tap Sync now to push everything immediately; the button shows Syncing… while it works.
- Each entry shows the learner, the direction, when it was created, and a status: Waiting, Sending, Sent, or Failed.
- A Sent entry can be cleared with Dismiss. A Failed entry can be removed with Delete, and a still-waiting one with Discard (both ask you to confirm first).
Visitor sign-ins that happened offline queue here too, alongside check-ins, and replay safely without creating duplicates.
Offline pack — keeping the gate working with no signal
The Offline pack is an encrypted, device-bound copy of the school’s badges, so the Gate can still recognise a learner when there’s no network. Nothing in here checks anyone in or out — it only lets badges keep resolving.
- Your admin first turns offline packs on in Settings → Offline pack (they’re off by default).
- Once enabled, open Offline pack from the menu and download a fresh pack at the start of each day, on each device.
- Refresh it whenever the learner list changes — packs are encrypted, tied to this device, and expire on their own.
If the button shows the pack is disabled, ask your admin to enable packs for your school.
Visitors — signing people in and out
Open Visitors from the Field menu. You get two big buttons: Sign in and Sign out.
Sign in collects only what your school requires. The visitor’s name is always asked; phone, reason for visiting, ID number, and vehicle registration appear only if your school turned them on. You also pick a destination (Reception, a teacher, etc.) and can add an optional contact name. Tap Sign in to record. ID numbers are encrypted at rest.
- If you’re offline, the sign-in queues to the outbox (amber) and sends later, exactly like a check-in.
- If the visitor has been banned by an admin, you’ll see a full red block panel. Entry is refused, no record is created, and only an admin can override — get your admin.
Sign out shows the list of visitors currently on-site. Find the person and tap once to sign them out.
Quick reference
| You want to… | Do this |
|---|---|
| Read a badge | Hold it to the top of the phone, or tap Type the badge number |
| Just check who a badge belongs to (no record) | Use Check tag — it’s a read-only lookup, nothing is recorded |
| Record a learner who came alone | Decision screen → arrived on their own |
| Record a guardian drop-off/collection | Decision screen → Dropped off by / Collected by → pick the guardian |
| See if everything sent | Watch the Gate pill: green All scans sent vs amber Waiting to send |
| Push queued records now | Waiting to send → Sync now |
| Prepare for no signal | Offline pack → download a fresh pack (admin must enable it first) |
That’s the whole gate. Scan, confirm the face, choose how they’re released, and let green mean done.